D-PHYS Lab Reservation System
In order to assist with the logistical challenges of post-lockdown lab revival, we have installed a lab reservation system that also allows to track attendance. The web-based interface is called Nemo, developed by NIST and already in use in FIRST.
Our Nemo instance can be found at reservation.phys.ethz.ch.
This documentation is not meant for Nemo end-users, but rather for local admins who would like to implement Nemo in their group. End-user usage is rather simple and instructions should happen directly in the group with the help of this readme.
The general process for Nemo implementation is the following:
- get in contact with us
- we will create an
Accountfor your research group - we then have to enter all group members who should use the system into the database - we can use an existing LDAP group or a list of D-PHYS uids
- one or two group members will then be appointed local admins who can manage rooms/experiments/etc
- now the local admin can log in and create one or more 'projects'. A project should be a logical research unit in your group (think of Tilman's Lattice Lab, Lithium Lab etc). You might just have one project.
- go to
Administration->Detailed administration->Project->Add. In the form enter something like this:
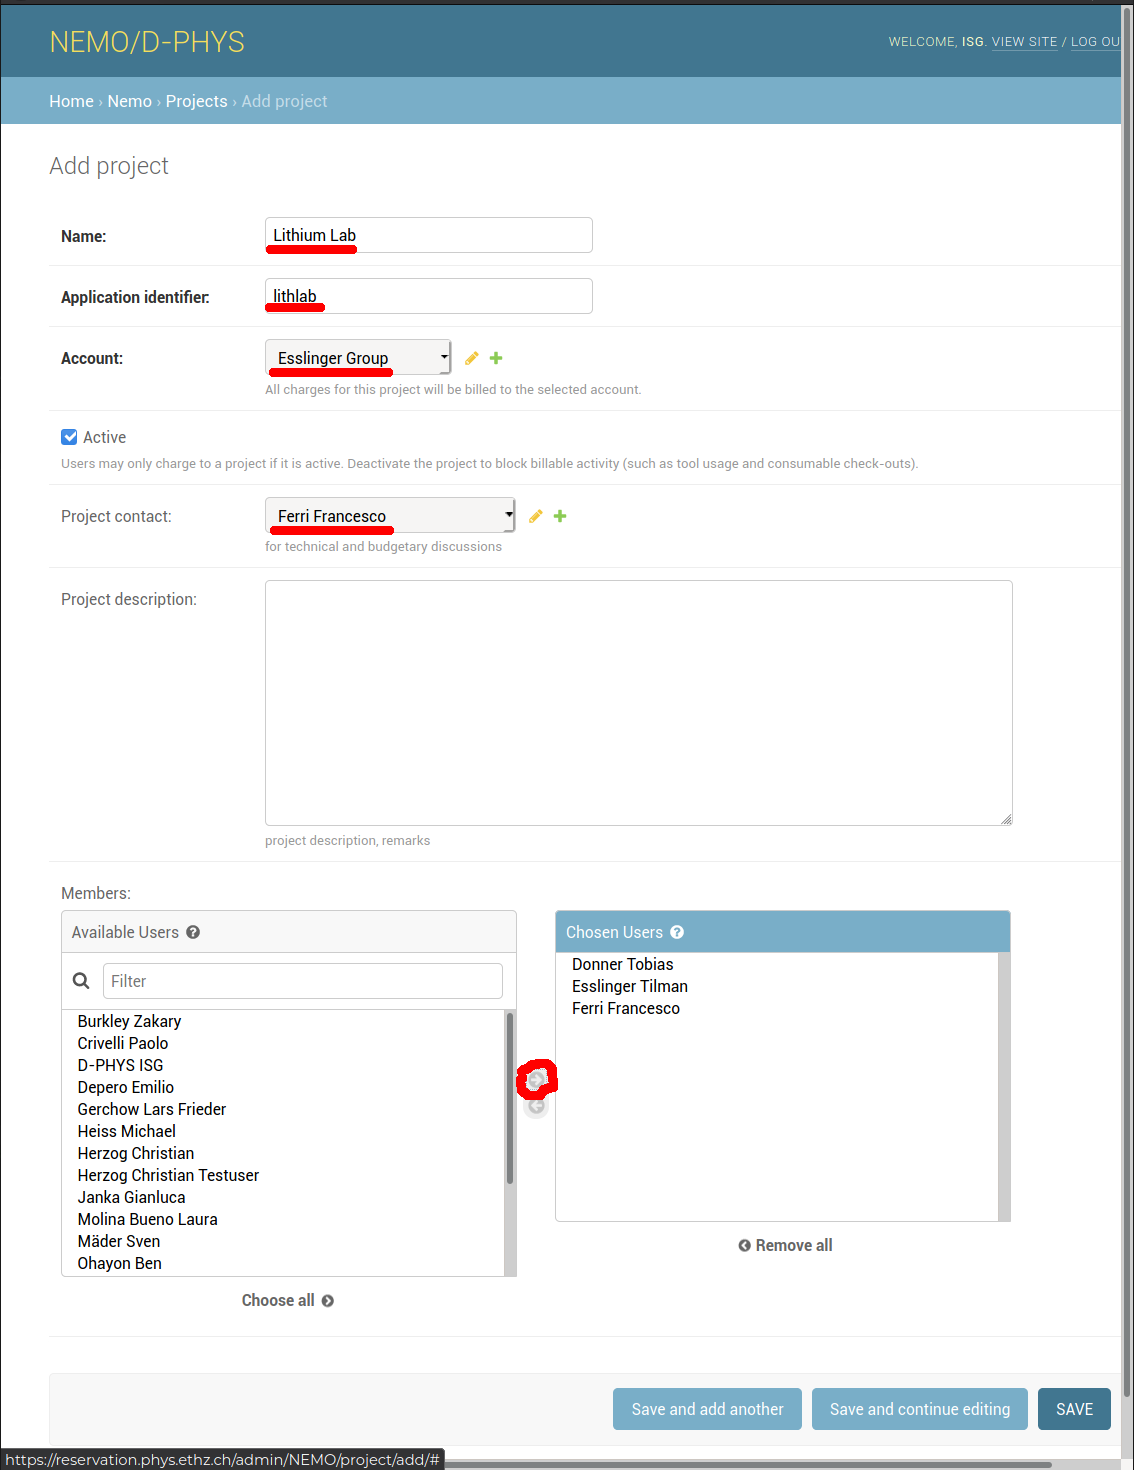
Name should be a mnemonic name, Application identifier is a required internal abbreviation (think of something nice and short), in Account choose your group and enter yourself in Project contact. Finally you have to add all users who work on this project and should be able to reserve its resources (again we can automate this if you have a list of uids). You can always add/change users later.
- next you should create one or more rooms or experiments. In Nemo, they're called Tools. Here we ask you to adhere to a naming scheme in D-PHYS so that we get a consistent structure: if you have just one experiment in a room, your
Toolshould be the room itself (case I). If you have multiple, create individual tools for each experiment in this room (case II). So go toAdministration->Detailed administration->Tools->Add. In the form enter something like this:
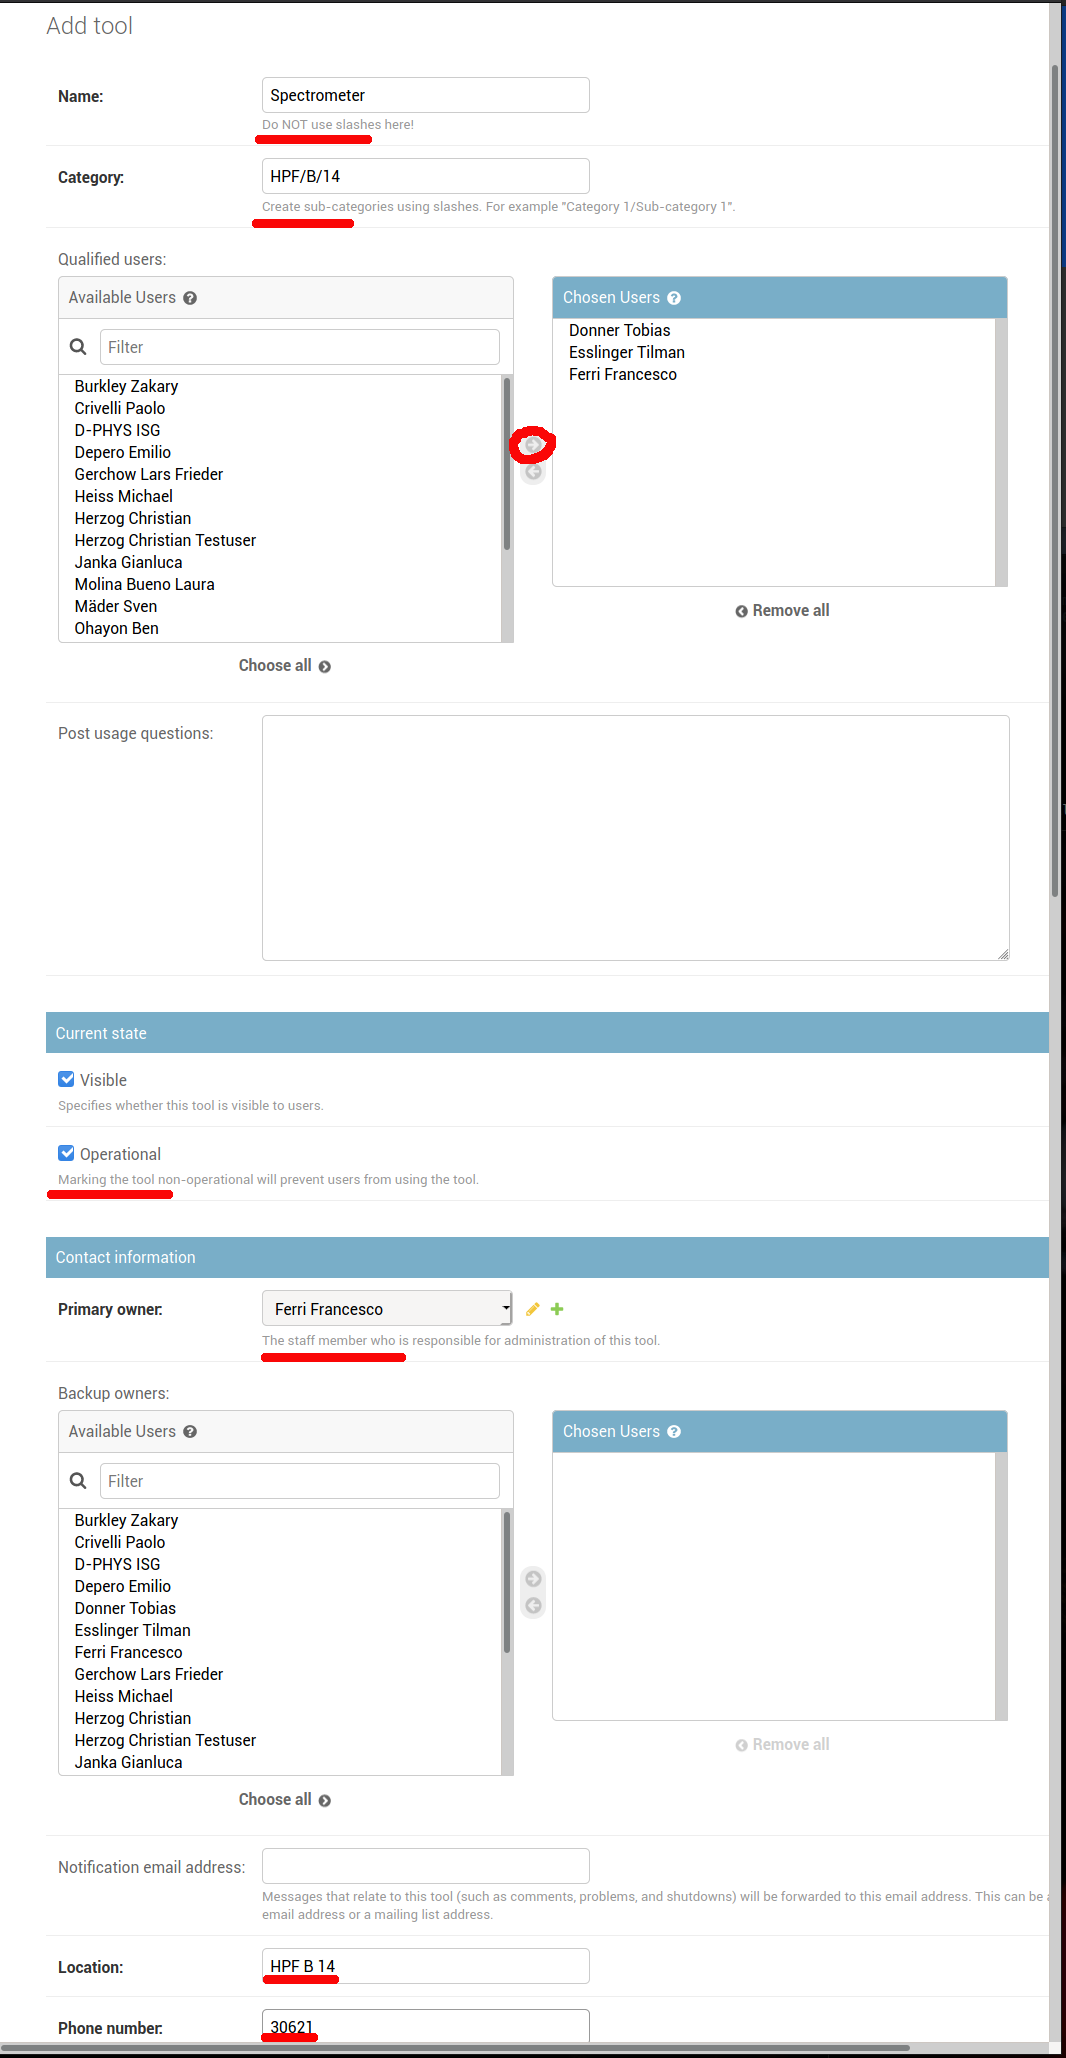
Name is the room number (like B 14) for case I or the name of the experiment (case II). The most important field is Category, since it determines the tree structure of tools in the calendar view. It always has the form 'BUILDING/FLOOR' (case I, room only) or 'BUILDING/FLOOR/ROOM' (case II, experiment in a room). Again, add the users you want to allow access (or give us the list of uids), set the tool Operational and set its owner (usually to yourself). Finally, fill the Location field (format BUILDING FLOOR ROOM) and enter a phone number (the real one if the room has one, 12345 otherwise). Then SAVE your new tool.
This should get you to a point at which you can start using Nemo for your reservations. Your users can now log in, make reservations and confirm they're using the tool they have reserved.
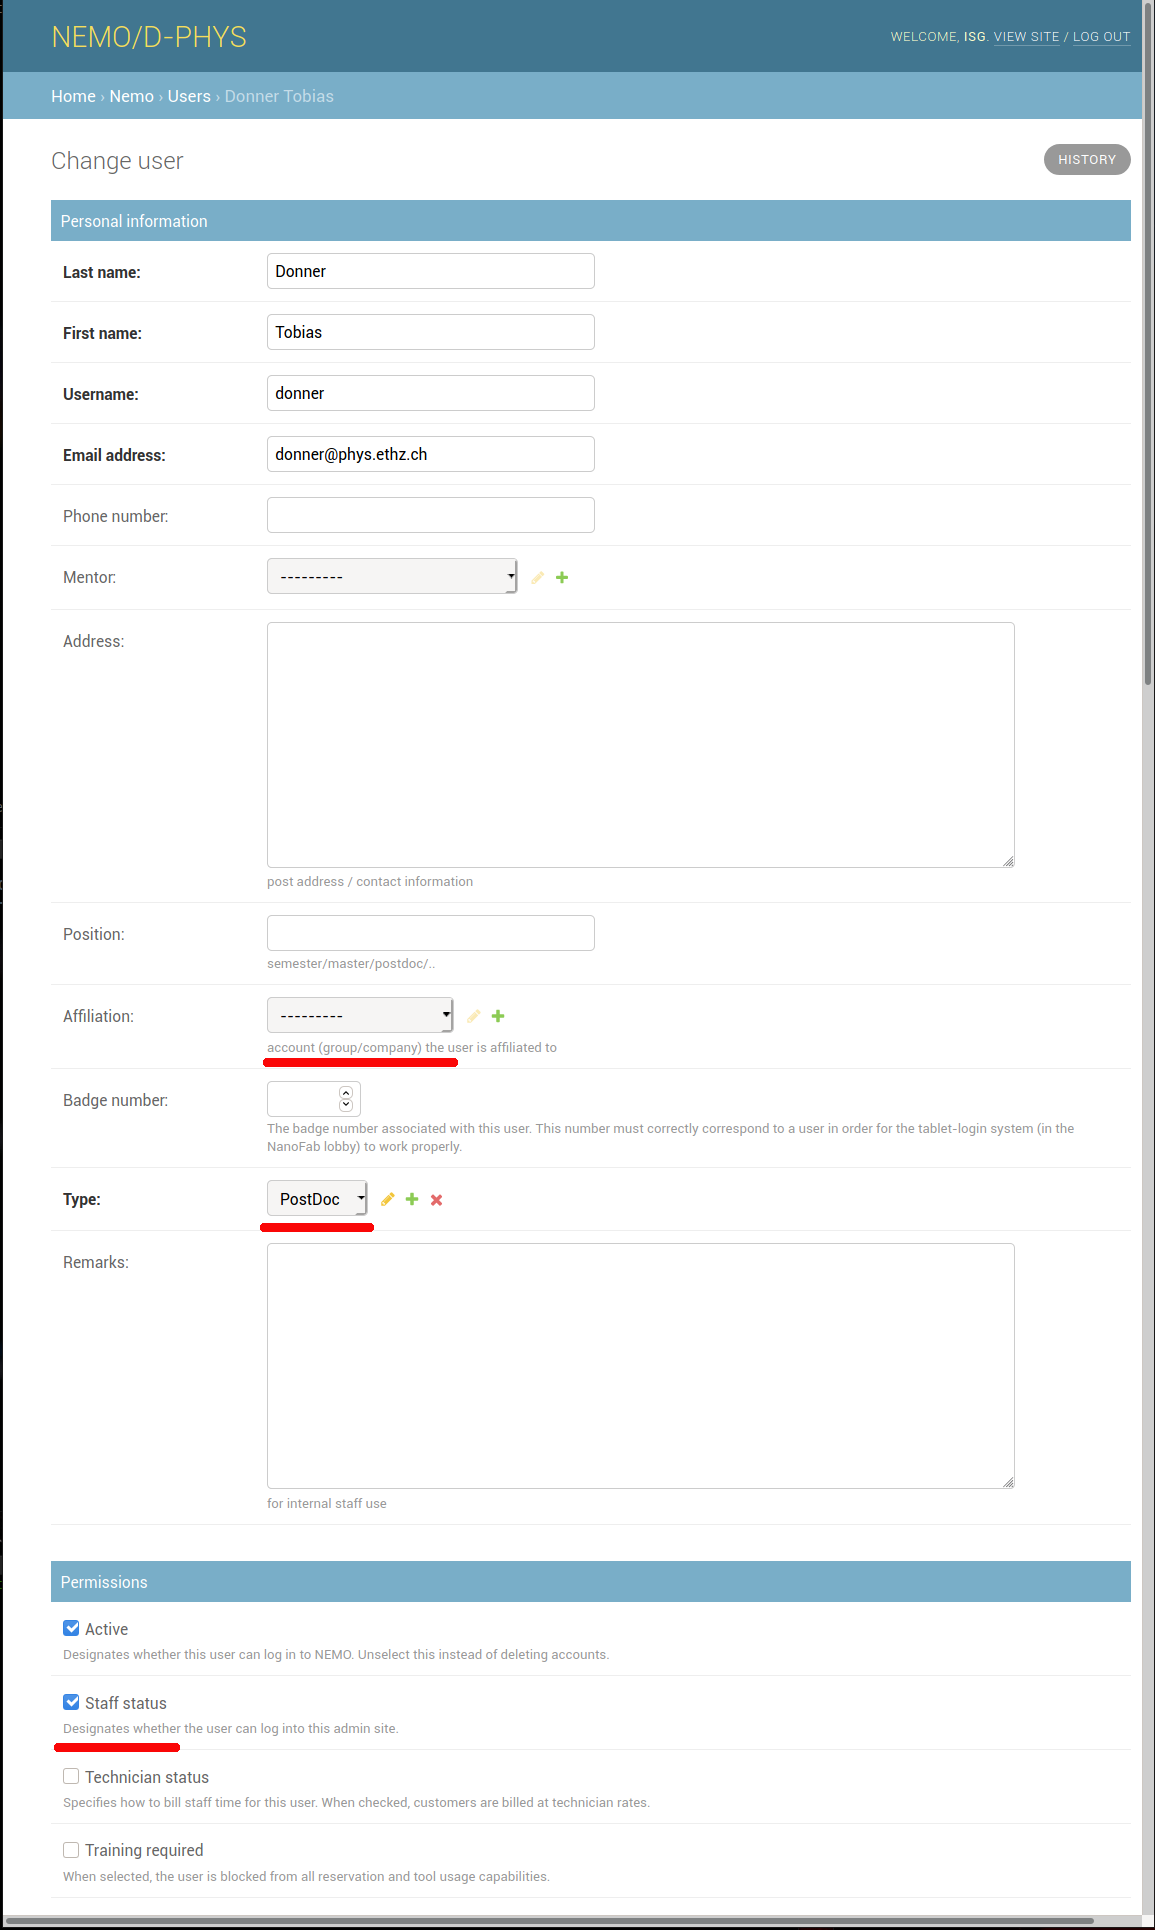
Finally, we'll take a look at the User form in case you need to make changes to a user's settings:
 Noteworthy are
 Affiliation (should be set to your Account already, but you can change it), Type, which is just informative but needs to be set, and Staff status, which toggles the /admin route in the web interface. As such, it should only be set for local admins like yourself, not for regular users.
Calendar deep links
In order to have a quick way of getting an overview of your group's experiment situation, Nemo now supports deep links like
https://reservation.phys.ethz.ch/calendar/14/9,15,16/ - this selects tool 14 and displays tools 9, 15 and 16. You can build those links for your group and distribute them to your coworkers.